Uploading files using Web3.Storage
This guide will cover on how to upload files to a decentralized file storage using Web3.Storage and Next.js.
In this tutorial, we will be learning on how to create a file sharing web application using Next.js where you can upload files on a decentralized file storage with Web3.Storage.
What is Web3.Storage?
Web3.Storage is a service that aims to make it easier developers build file storage functionality on top of the Filecoin storage network through an easy to use JS library interface.
What is Filecoin?
Filecoin is a decentralized protocol that allows anyone in the world to rent out their spare storage on their computer. This will enable millions of computers in the world to form a huge decentralized storage network that will not have a single point of attack, making the network harder to compromise compared to centralized storage networks.
In addition to that, as the files will be uploaded to an IPFS network, the file content cannot be changed without altering the content identifier (CID) of the file. Thus, this guarantees immutability which makes it great for uploading files that do not need to change. One use case is in the NFT space where the NFT metadata will not change over time, thus giving buyers the assurance and accountability that the metadata that is tagged to a CID cannot be changed after uploading.
Getting Web3.Storage API key
Before interacting with the Web3.Storage service, we have to generate a Web3.Storage API token so that we can interact through the either the JavaScript client API or command line.
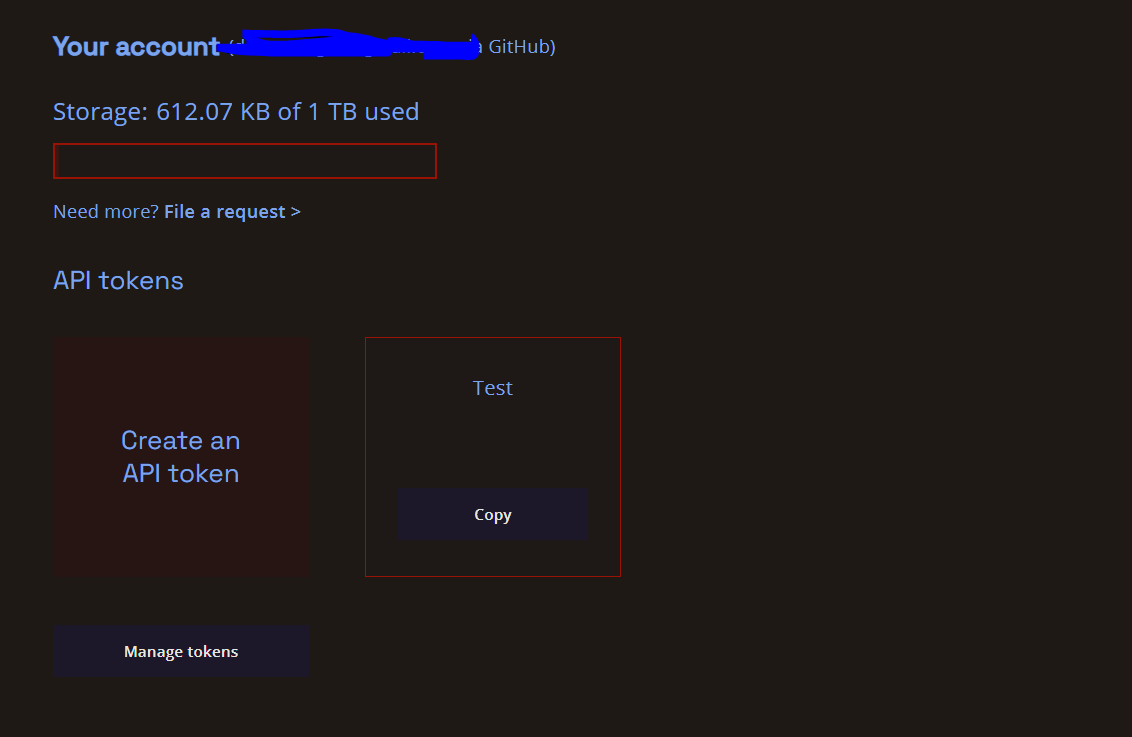
- Navigate to https://web3.storage/account/ or the "Account" tab. Each account will allow you to store up to 1TB of file.
-
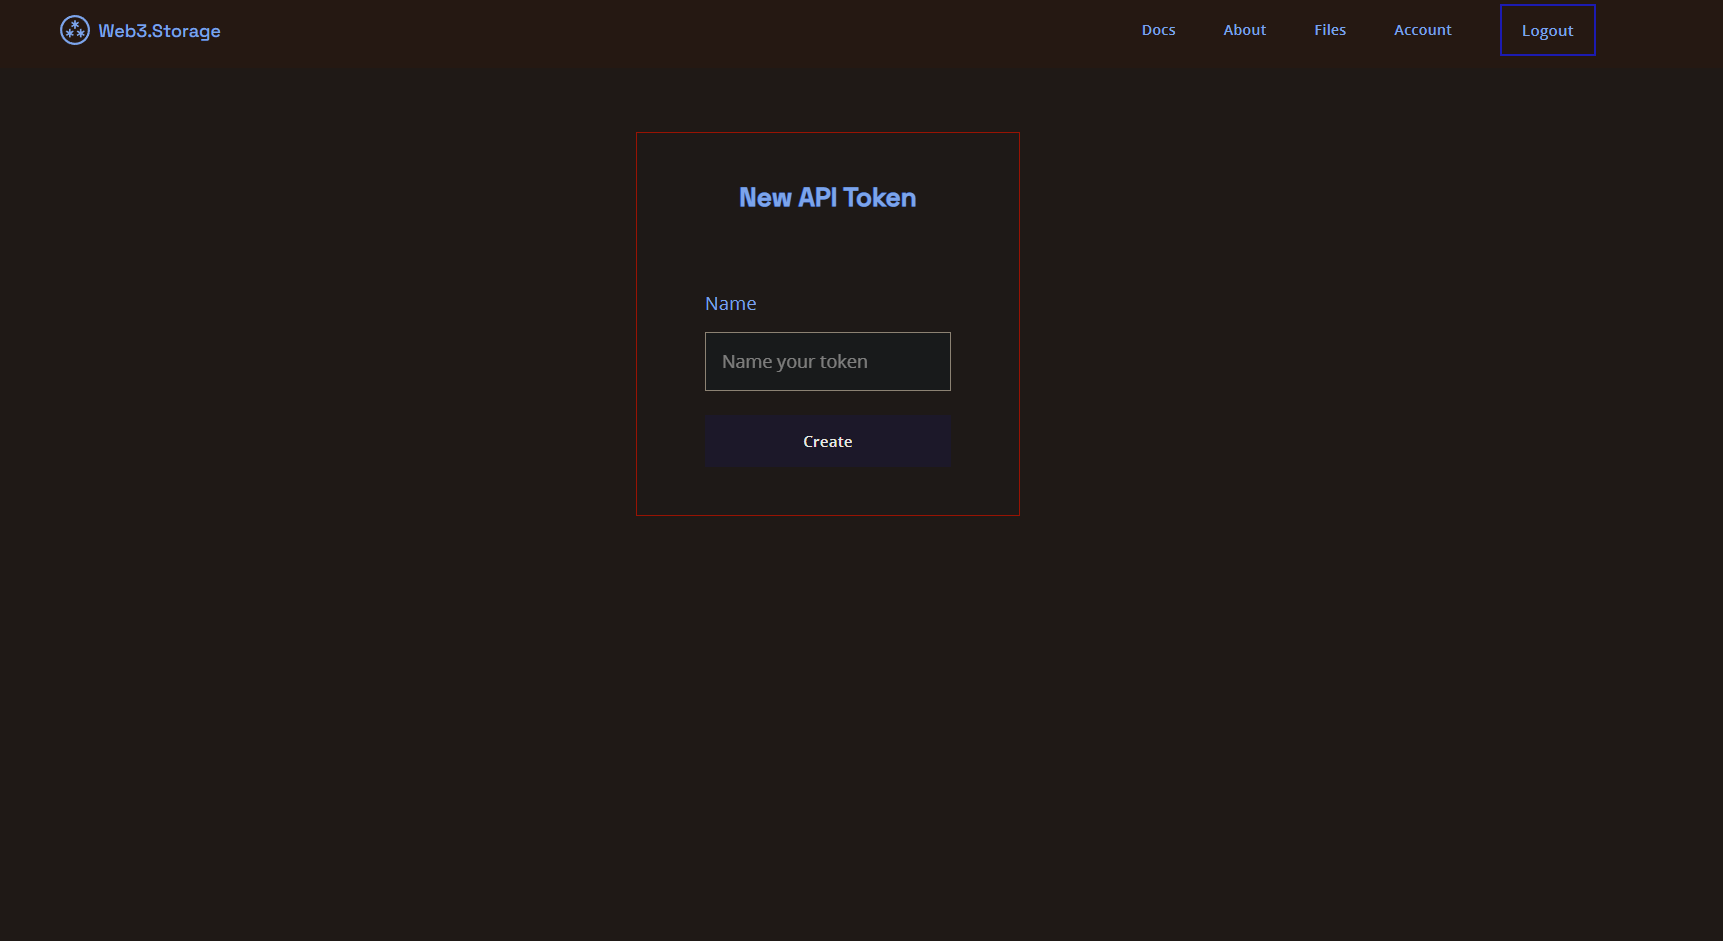
Click the "Create your first API token" to generate an API token.
-
Give the API token a suitable description.
-
Click "Create" in order to complete the API key creation process.
- You will be navigated to the page https://web3.storage/tokens/. In this page, you will be able to view all the API tokens that you have created.
Getting Started
- Clone the GitHub Repo:
git clone https://github.com/DtCarrot/web3-storage-file-upload file-upload-app
- Install the npm dependencies
npm install
- In order to connect the web app to the Web3.Storage service, we need to set up the API key. In the root directory, create a file called .env.local and add the following line.
NEXT_PUBLIC_WEB3_STORAGE_API_KEY="Replace with Web3.Storage API Key"
- Run the Nextjs App
npm run dev
- Open the application at http://localhost:3000
Understanding the code
Upload Image Page
The upload image page template is located at pages/index.tsx. In this file, we will be using the <DropArea/> method that we will define later in order to display the drag and drop box for users to drag and upload their image from their local system.
Full code for pages/index.tsx:
import type { NextPage } from 'next'
import Head from 'next/head'
import DropArea from '../components/DropArea'
import styles from '../styles/Home.module.css'
const Home: NextPage = () => {
return (
<div className={styles.container}>
<Head>
<title>Upload File</title>
<meta name="description" content="Generated by create next app" />
<link rel="icon" href="/favicon.ico" />
</Head>
<main className={styles.main}>
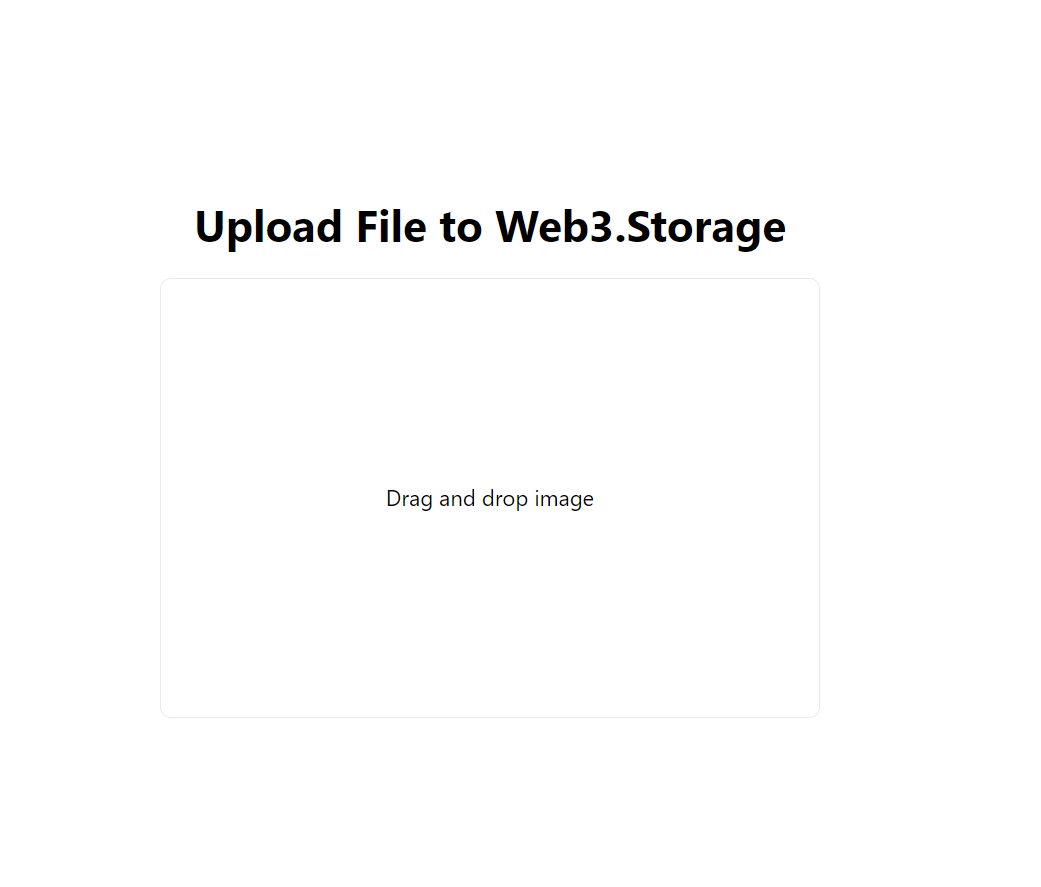
<h1 className={styles.title}>
Upload File to Web3.Storage
</h1>
<DropArea/>
</main>
</div>
)
}
export default Home
Creating the Drag and Drop Box
We will be creating the drag and drop box which we define in components/DropArea.tsx. We define the onDrop={e=>onDrop(e)} prop in the <div> element that will call the onDrop=(e:React.DragEvent) when the image have been dropped into the drop area.
<div
    onDrop={e => onDrop(e)}
    className={styles.card}>
      {data !== null && <img className={styles.image} src={data?.toString()}/>}
      {data === null && (
<p className={styles.dropAreaText}>Drag and drop image</p>
      )}
</div>
In the onDrop(e:React.DragEvent) method, we start to read the file by using the FileReader to read the file that have been dropped into the dropzone using e.dataTransfer.files. After that, we perform two validations:
- Check whether the file type is either image/jpeg, image/jpg, image/png.
- Check whether the file size is less than 2MB.
After performing the validation check, we proceed to read the file as data url so that we can display the image preview before the user decides to upload the image to Web3.Storage.
const onDrop = (e: React.DragEvent) => {
    e.preventDefault();
    const {
        dataTransfer: { files }
    } = e;
    const { length } = files;
    const reader = new FileReader();
    if (length === 0) {
        return false;
    }
    const fileTypes = ["image/jpeg", "image/jpg", "image/png"];
    const { size, type } = files[0];
    setData(null);
    // Limit to either image/jpeg, image/jpg or image/png file
    if (!fileTypes.includes(type)) {
        setErr("File format must be either png or jpg");
        return false;
    }
    // Check file size to ensure it is less than 2MB.
    if (size / 1024 / 1024 > 2) {
        setErr("File size exceeded the limit of 2MB");
        return false;
    }
    setErr(false);
    reader.readAsDataURL(files[0]);
    setFile(files[0])
    reader.onload = loadEvt => {
        setData(loadEvt.target?.result);
    };
}
In the DropArea() component in DropArea.tsx, we also define the Dropzone components that will be displayed on the page, together with the image preview and two buttons that will be used to upload and delete the image on the page respectively.
return (
<>
<div
onDragOver={e=> e.preventDefault()}
onDrop={e => onDrop(e)}
className={styles.card}>
{data !== null && <img className={styles.image} src={data?.toString()}/>}
{data === null && (
<p className={styles.dropAreaText}>Drag and drop image</p>
)}
</div>
{err && <p>Unable to upload image</p>}
{data!==null && (
<div>
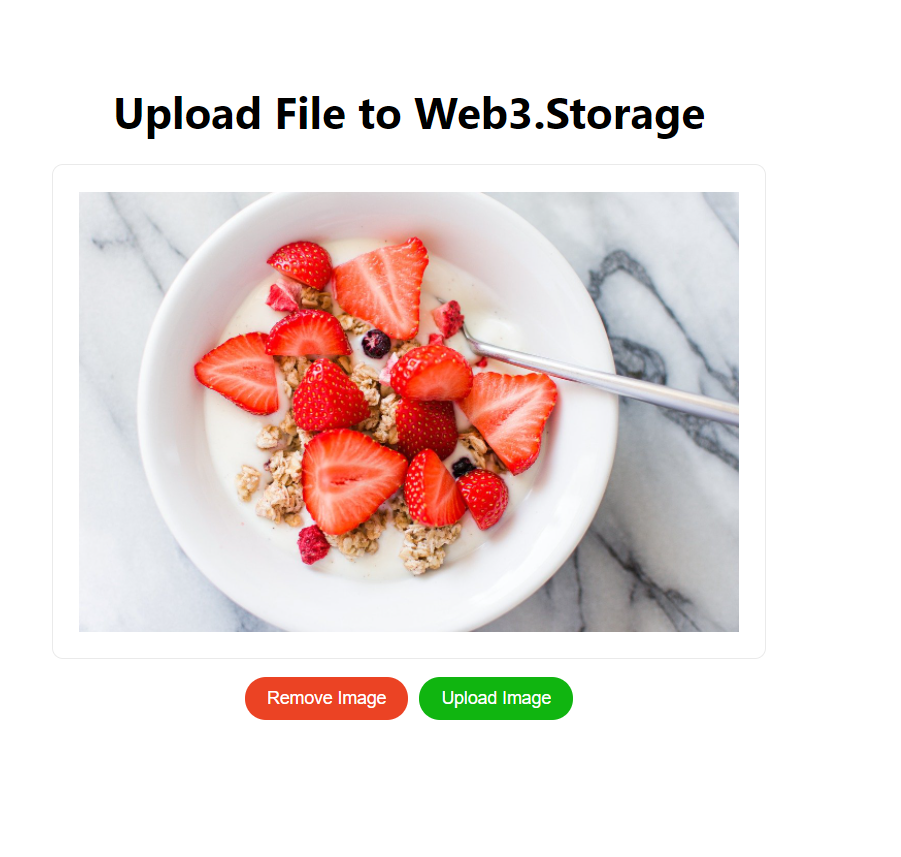
<button className={styles.deleteButton} onClick={()=>setData(null)}>Remove Image</button>
<button className={styles.uploadButton} onClick={()=>uploadImage()}>Upload Image</button>
</div>
)}
</>
)
Full code for components/DropArea.tsx:
import { useState } from 'react';
import styles from '../styles/Home.module.css'
import StorageClient from '../utils/StorageClient';
import Router from 'next/router'

const DropArea = () => {
    const [data, setData] = useState<ArrayBuffer | string | null | undefined>(null);
    const [err, setErr] = useState<string | boolean>(false);
    const [file, setFile] = useState<File | null>(null);
    const onDrop = (e: React.DragEvent) => {
        e.preventDefault();
        const {
            dataTransfer: { files }
        } = e;
        const { length } = files;
        const reader = new FileReader();
        if (length === 0) {
            return false;
        }
        const fileTypes = ["image/jpeg", "image/jpg", "image/png"];
        const { size, type } = files[0];
        setData(null);
        // Limit to either image/jpeg, image/jpg or image/png file
        if (!fileTypes.includes(type)) {
            setErr("File format must be either png or jpg");
            return false;
        }
        // Check file size to ensure it is less than 2MB.
        if (size / 1024 / 1024 > 2) {
            setErr("File size exceeded the limit of 2MB");
            return false;
        }
        setErr(false);

        reader.readAsDataURL(files[0]);
        setFile(files[0])
        reader.onload = loadEvt => {
            setData(loadEvt.target?.result);
        };
    }

    const uploadImage = async () => {
        const imageURI = await new StorageClient().storeFiles(file)
        Router.push(`/result?url=${imageURI}`);
    }

    return (
        <>
            <div
            onDragOver={e=> e.preventDefault()}
            onDrop={e => onDrop(e)}
            className={styles.card}>
                {data !== null && <img className={styles.image} src={data?.toString()}/>}
                {data === null && (
                    <p className={styles.dropAreaText}>Drag and drop image</p>
                )}
            </div>
            {err && <p>Unable to upload image</p>}
            {data!==null && (
                <div>
                    <button className={styles.deleteButton} onClick={()=>setData(null)}>Remove Image</button>
                    <button className={styles.uploadButton} onClick={()=>uploadImage()}>Upload Image</button>
                </div>
            )}
        </>
    )
}

export default DropArea
Uploading image to Web3.Storage
We define a separate file (utils/StorageClient.ts) that will contain the code that shall have the logic for storing the file into the Web3Storage.
Full code for utils/StorageClient.ts:
import { Web3Storage } from 'web3.storage'
import { v4 as uuidv4 } from 'uuid';

class StorageClient {
    client: Web3Storage;
    constructor() {
        this.client = new Web3Storage({
            token: process.env.NEXT_PUBLIC_WEB3_STORAGE_API_KEY!,
        })
    }
    public async storeFiles(file: any) {
        const ext = file.name.split('.').pop();
        const fileName = `${uuidv4()}.${ext}`;
        const newFile = new File([file], fileName, {type: file.type});
        const cid = await this.client.put([newFile], {
            name: fileName,
        });
        const imageURI = `https://${cid}.ipfs.dweb.link/${fileName}`;
        return imageURI;
    }
}
export default StorageClient
Breaking down the code above, in the constructor method, we define the code to create an instance of Web3Storage.
constructor() {
  this.client = new Web3Storage({
    token: process.env.NEXT_PUBLIC_WEB3_STORAGE_API_KEY!,
  })
}
We also have another method called storeFiles(file) that will convert the file into the file name into a uuid and call this.client.put to upload the file into Web3Storage. The cid shall represent the directory that contains the file that have been uploaded.
public async storeFiles(file: any) {
  const ext = file.name.split('.').pop();
  const fileName = `${uuidv4()}.${ext}`;
  const newFile = new File([file], fileName, {type: file.type});
  const cid = await this.client.put([newFile], {
    name: fileName,
  });
  const imageURI = `https://${cid}.ipfs.dweb.link/${fileName}`;
  return imageURI;
}
In order to make a gateway link to the file, use the following format https://<cid>.ipfs.dweb.link/<filename>. In order to use the IPFS url, use ipfs://<cid>/<filename>. We shall be returning the gateway link URL format from the method.
After the user have dragged the image into the dropzone and satisfied with the image preview, they can click the "Upload" button that will call the uploadImage() method that will call the storeFiles() method to upload the file to Web3Storage. After storing the file, we shall redirect to the the page localhost:3000/result?url=${imageURI} using the Router.push(url) method.
const uploadImage = async () => {
  const imageURI = await new StorageClient().storeFiles(file)
  Router.push(`/result?url=${imageURI}`);
}
Viewing the result
In this results page, it will display the url of the image that have been uploaded as well as clipboard feature to copy the image url so that you can share your image with your friend.

Full code for the result page is at pages/result.tsx.
import type { NextPage } from 'next'
import { useRouter } from 'next/dist/client/router'
import Head from 'next/head'
import styles from '../styles/Home.module.css'
import { FaClone } from 'react-icons/fa'
import { useState } from 'react'

const Result: NextPage = () => {
    const router = useRouter();
    const result = router.query;
    const url = (result.url as string);
    const [popover, setPopover] = useState<boolean>(false);
    const copyClipboard = () => {
        window.navigator.clipboard.writeText(url);
        setPopover(true);
        setTimeout(() => {
            setPopover(false)
        }, 5000);
    }
    return (
        <div className={styles.container}>
        <Head>
            <title>Upload File</title>
            <meta name="description" content="Generated by create next app" />
            <link rel="icon" href="/favicon.ico" />
        </Head>
        <main className={styles.main}>
            <h1 className={styles.title}>
                Result
            </h1>
            <img className={styles.image} src={url}/>
            <p>
                File has successfully been uploaded <a className={styles.link} href={url} target="_blank">here</a>
                <span className={styles.clipboardWrapper}>
                    <FaClone onClick={()=>copyClipboard()} className={styles.clipboard}/>
                </span>
            </p>
            {popover && <p className={styles.popover}>Copied to clipboard</p>}
        </main>
        </div>
    )
}
export default Result
Conclusion
In conclusion, this tutorial is designed to help you get started with uploading a file to Web3.Storage through the use of a drop and drop web interface. By uploading it to an IPFS network, it will ensure that the file will be immutable and cannot be changed after it has been uploaded.
The full source code can be found here.